Ever have a project that starts off so easy and ends with a frustrated crafter about to go out of her mind? That was the last couple days for me! Earlier this week, I started playing with some fabric scraps I had lying around and was inspired to make fabric flowers. I found this tutorial from Lil Blue Boo for a fabric flower headband and stayed up far too late making just the flowers! (So much fun!)
The next day, I posted a picture of the previous night’s crafting on my Facebook page and announced that I was going to make more and post the tutorial here on the blog. I ran out for more fabric and formulated my plan to make the flowers as a pin and incorporate them into a few fun wedding details (inspired by THIS PIN from Pinterest).
My problem was that I hadn’t actually finished the craft the night before; I had just made the flowers. So even though the flowers were easy and fast to make, I wasn’t completely proficient in the entire craft. Once I got past making the actual flowers, I ran into difficulties putting on the finishing touches. (On the positive, good thing it’s a long weekend, right?!)
So, better late than never, here we go…
Supplies:
- Fabric
- Chenille pipe cleaners
- Fabric glue
- Pin backs
Tools:
- Scissors
- Ruler
- Clothespins or clips
Instructions:
Connect the pipe cleaners. Two make the perfect size (about 20 inches). I tried making a larger flower from three pipe cleaners, but it didn’t turn out to be much bigger and I feel it was more hassle than it was worth.
Cut the fabric into strips that are approximately 25 inches x 1½ inches (longer if you are doing a larger flower).
Put glue along the center of your fabric strip.
Fold one end of the fabric strip around the pipe cleaner and begin wrapping fabric around. It doesn’t have to be perfect and if you run out of fabric before reaching the end of the pipe cleaner, you can just add another strip of fabric and continue where you left off. When completed, glue the fabric to secure it and cut off any excess.
Begin twisting one end of the fully wrapped pipe cleaner to form the center of the flower.
Continue rolling the fabric into a circle, adding a drop of glue every few inches and twisting as you go.
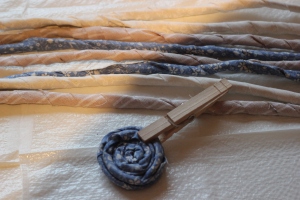
Once you’re finished rolling, tuck the end into the flower, add a drop of glue and secure with a clothespin or other clip. Allow the flower to dry for about one hour.
This is when I began running into problems. I found that the felt didn’t work well with the fabric glue for a back, so I decided to stick with using the fabric instead. I printed a few templates in Word for the circles in the sizes I was making. Remember, it doesn’t have to be perfect.
Add glue to the back of the fabric circle and press onto the back of the flower.
Then, glue the pin back to the flower and allow it to dry for at least another hour, longer if you can.
My original vision was to make escort cards. I thought the pins might be cute and personal to include in bridesmaids gifts as well. You could use a different fabric for each bridesmaid, attach the flowers to a basic tote bag that you can get from a craft store, or even just pin them to a notecard to use as a sweet and personal thank you note. Lots of ideas!
Like with last weekend’s craft, this one brings to light some important considerations if you’re planning a DIY wedding. You MUST practice things first before going out and getting all the supplies. Plan everything out so that you don’t waste time or materials. And speaking of time, give yourself PLENTY!
Of course I made a few mistakes that I’ll mention. Constantly remind yourself during the course of this project that it doesn’t have to be perfect. In fact, I think the flowers look more shabby chic (like in the original tutorial) if they aren’t perfectly done. I wrapped the pipe cleaners far too tight with the fabric and continued that trend when I was rolling the flower. Also, I would use a glue gun instead of the fabric glue to secure the pin back. While the fabric glue held for me, it took more time to dry and wasn’t quite as sturdy as I would have liked.
Hoping you are all having a fantastic holiday weekend! See you next week!


